Labels

Showing posts with label Tutorials. Show all posts

Friday, February 17, 2012

Easy Kids Journal or Drawing Book Tutorial

I love volunteering my my kids classes! The Kindergarten teacher has the best ideas and I get to make a lot of creative things for the kiddos to use. Today she had me make journals for them to practice their writing in. I'm not sure where she got the idea from, but probably from Pinterest.


I'm sorry about the cell phone quality photos, but I didn't have my regular camera with me.

You will need a large piece of construction paper, white copy paper (or lined paper), a rubber band and 2 popsicle sticks.

(I cannot get this photo to flip around!!!!)

Fold the construction paper in half and hole punch with 2 holes.

Cut the copy paper in half (or to the size you want them to be) and hole punch them with 2 holes just like the construction paper.


String a rubber band through the back cover and the copy paper. Then put a popsicle stick through that rubber band to hold in place. Take the other end of the rubber band and string it through the other hole of the cover and papers. Now string that side through the front of the cover and slide a popsicle stick through the end of the rubber band. 


Remove the first popsicle stick and pull the rubberband through the front cover. Slide the other end of the stick through the rubber band and you're done!


Friday, January 13, 2012

Mod Podged Comic Book Jewelry Box and Cell Phone Charging Area

When I found this cute jewelry box at a thrift store for $2, I knew it had to be Mod Podged with Comics! Since it's a girly item I thought it would be best to use all female characters.


The jewelry box was in great condition, but had a couple of nicks and the paint was old. After being Mod Podged, the nicks are not noticeable at all! I removed the screws and hardware from the front and removed the glass pieces before working on it. I then painted the drawers and entire inside of the box black. Then I touched up some other areas as well with the black paint.


The only real problem with this jewelry box is that there is a drawer missing. So, after Googling ideas, I found an idea to drill a hole in the back and make a cell phone charging area...brilliant!

Monday, November 14, 2011

Stretchy Fabric Headband Tutorial


I see these headbands on Etsy for up to $8 each. A friend wanted me to try to make some for her girls. They turned out pretty cute! 

Supplies:
1/8 yard cotton fabric (this will be enough fabric to make 2 headbands)
4.5 inches elastic - I used 1/4 inch wide
sewing machine and matching thread
2 safety pins 
cardboard to make a pattern piece

To make the pattern, I recycled some thin cardboard. Use the photo below to draw the shape. The length across is 8 in. The height of the right side of photo is 3 1/3 inches. The height of the left side of the photo is 1 1/2 inches.

Fold your fabric in half, trace the pattern and cut with the folded edge on the 3 1/3 inch side. 


Next cut a rectangle about 6 1/2 x 1 3/4 inch. These are the 2 pieces you will now have:


Fold the main fabric piece in half lengthwise and press.


Sew along the long side, leaving openings on each end.


Pin a safety pin to the end and push through to turn the whole piece right side out.


Press open so that the seam in on the underneath side.

Sew the rectangle lengthwise.


Use the safety pin to turn the rectangle right side out. Attach the safety pin to the end of the elastic and push through the rectangle. I like to pin each side now and sew each end so that the elastic won't move.


Turn the end of the main headband piece under and put the end of the elastic piece inside that end. Sew across, making sure that you are sewing through the main piece, rectangle AND elastic. Repeat with other end.

That's it!


These measurements are for a child size. If you would like to make an adult size, just adjust the rectangle and elastic accordingly!

Monday, October 10, 2011

Scrappy Rosette Headbands

I have been making loads of dance skirts out of a sheer fabric. Therefore, I have some really great scraps of that fabric left over. I have seen a lot of really cute fabric rosettes on blogs lately and decided to try to make some. They are really easy!

I just twisted the fabric and rolled it into the rosette. Instead of sewing it together, I just hot glued it here and there so that it would stay together nicely. I had a bunch of jewels, so I glued them in the middle. These stretchy headbands were at Walgreens for $1.99 for a pack of 6 and 6 ponytail holders. They are really pretty and I loved the colors. I actually sewed the rosettes on the headbands and then hot glued them. Hopefully they will stay on!

Monday, August 29, 2011

Super Cute and Easy Bottle Cap Key Chains for Party Favors - Tutorial

I really don't like most of the cheap toys that are considered party favors for kids parties!

This year I have decided to make something unique for all of the kiddos. My son wanted a Super Mario Bros. themed party, so I made key chains. I figured that they can hang them on their backpacks since it's the beginning of the school year.


These are really easy!

You will need:
1 inch round graphics - Buy the ones I have here
1 inch circle punch
glue
bottle caps (flattened or not)
metal punch or nail and hammer
jump rings
chain and ring or clip
1 inch epoxy adhesive dots

Buy some printable round graphics on Etsy (or use your own), print them, and punch them out with a 1 inch circle punch.

Punch a small hole in the bottle cap where you want the jump ring to attach the chain.

Next, glue the graphic into the bottle cap with a tiny amount of glue.

Stick the epoxy dot on top of the glued graphic.

Attach the jump ring and chain into the hole in the bottle cap.

That's it! They are really easy and super cute!

Thursday, June 23, 2011

DIY Dress From 3 Pieces of Fabric - Tutorial

I made this dress for a friend to wear to her 20th high school reunion this summer. It was super easy and really turned out cute!


For this dress, I recommend buying 2 yards of fabric. I made this with 1 1/2 yds, but it really cut it close!

I don't really measure, but just wrap the fabric around the bust and body. The bust should be tight, so that it doesn't fall down. I like to fold the fabric in half so that  I don't have to sew the top neck line.

The body part needs to be big enough to fit and hang loosely around the biggest part of the hips. If not, it will be clingy and look gross. In the middle, I gathered the body piece a bit and then sewed the two pieces together, stretching a bit as I went.

Since this is a nice stretchy knit fabric, I didn't even hem the bottom, just made sure to cut it very straight. I just cut a long strip for the tie and that's it.

When wearing it, I recommend safety pinning the tie to the dress from the inside to keep it in place and to hide the seam where the 2 pieces are attached.


Friday, June 3, 2011

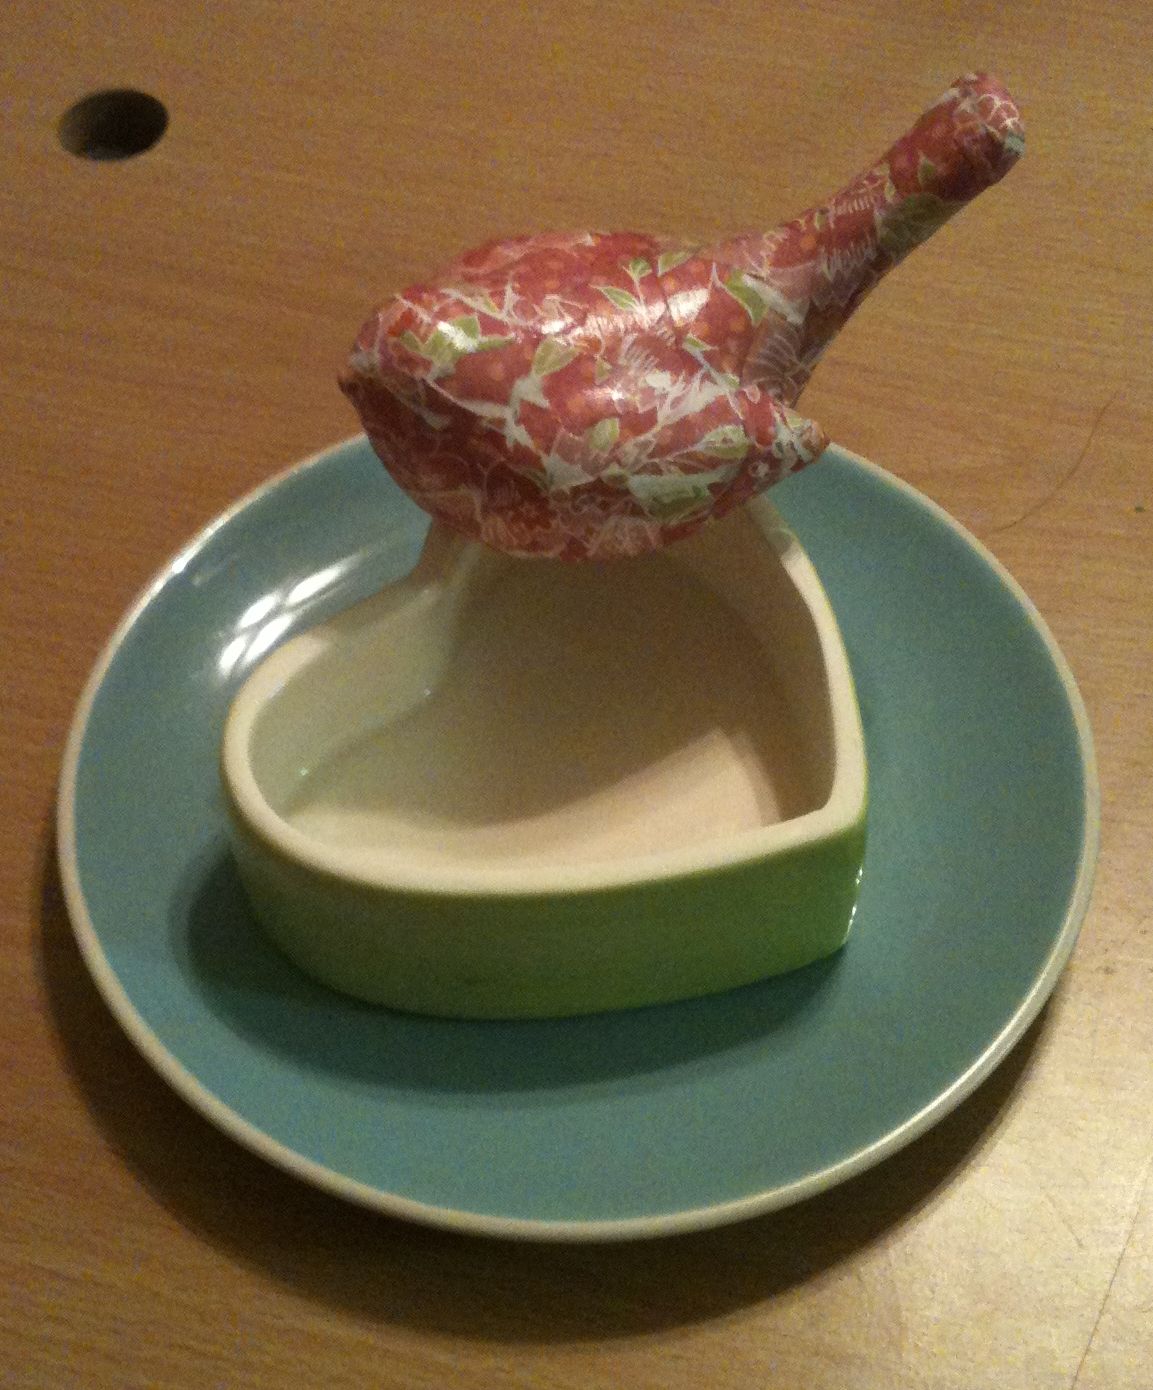
$3 Bird Feeder - Another Mod Podge Project

This is my mom's birthday gift this year. Isn't it cute?

I got all 3 pieces at the $1 store. I Mod Podged the bird with scrapbook paper and used E-6000 to glue them together. It was such an easy project. The hardest part was waiting for the glue to dry!

Sunday, May 22, 2011

End of the School Year Gift Idea - Otter Pop Holder Tutorial

The end of the school year is coming up and I want to do something cute for the kids. I saw this idea somewhere and can't remember where...sorry!

I'm going to make an otter pop holder for each kid and bring otter pops for the kids on the last day of school. They help to keep their little hands from getting too cold while eating them.

Just cut 2 rectangles of felt. Mine are about 2 1/2 inches by 4 1/2 inches. Lay them on top of each other and zig zag stitch both sides, which will leave a tube. For decoration purposes, cut the sides with pinking shears. I'm sure the kids will love these and they're so easy. It should take under an hour to make enough for the whole class!


Check out the linky parties to the right that I'm linking up to this week!

Tuesday, May 10, 2011

Yarn or Fabric Wrapped Clothesline Rope Bangle Bracelet Tutorial


These are super cute, easy and cheap bangle bracelets. For a couple of dollars, you can make a whole bunch of them!

You will need rope, painters tape, yarn or long strips of fabric, glue (Weld Bond or hot glue). I got an 80 ft clothesline at the dollar store and Big Lots has great unique yarn/fibers for a dollar as well.

Wrap the clothes line in a circle 3 times and cut it to fit your wrist.

Wrap the tape around the piece of rope to secure it.

Keep wrapping the tape around until you get a secured circle.


Now start wrapping th ring with the yarn/fabric. Be sure to tuck the end under so that it will not unravel.


When you have wrapped the whole ring, glue the end to the inside of the bangle. If you use weld bond or a glue similar, you will have to hold the end down until it starts to dry or it won't stick very well. If you use a wool yarn, you will have to hold it down longer and use more glue. It's hard to make it stick!

That's it!


If you haven't yet, check out Debbiedoos for an awesome new blogger linky party!

Friday, May 6, 2011

Teacher's Appreciation Week Gift - Mod Podged Clipboard Tutorial


Of course I waited until Thursday night to decide what I was going to make for my son's teacher for Teacher's Appreciation Week! Well, I just finished this super cute clipboard!

I bought a clipboard at a thrift store about 3 months ago for $1.00 and finally got around to using it. I used 2 coordinating pieces of scrapbook paper, some grossgrain ribbon and Mod Podge.

The how to:
1. Measure the clip board and cut the paper to fit the lengths you want to cover. You may want to use an exacto knife to cut around the metal clip part.
2. Brush some Mod Podge over the clipboard and stick the first paper to it. I use my finger to smooth the air bubbles out. Then brush some more Mod Podge on top of the paper and smooth it out as well.
3. Repeat with the second piece of paper. I overlapped the papers, but you could cut and line them up as well.
4. Using scissors, round the edges of the paper to match the rounded edges of the clipboard.
5. Cut small pieces of ribbon and tie them on to the clip.

That's it! This makes a super easy, cheap gift! I had all of the supplies, so it cost me nothing to make.

Sunday, April 24, 2011

Tie Dye Projects from Leftover Easter Egg Dye

Happy Easter!


This year I bought my boys tie dye Easter egg dye kits. They turned out pretty cool. I wanted to come up with something to use the extra dye on.


Pillows!

I found some nice white flannel in my fabric stash and cut up some rectangles. Then I twisted from corner to corner diagonally. Next I tied the fabric in a knot and tucked in each end.


My boys got to do the fun part. We had a very small eye dropper left from the egg kit. I had the boys squirt random colors all over the tied up fabric. I made sure that they got deep inside the knot as well.


Then we untied the fabric and voila! Cute pillow fabric was born!


My 4 yr old wanted to tie dye some of his undies and socks as well. So, of course we did. They turned out pretty cool too.


I think that most of the dye will wash out of the socks and undies, but it was still a super fun project. If you can come up with things to tie dye that you don't have to wash, that would be the best. Happy Tie Dying!

Friday, April 8, 2011

Tutorial - Free Facebook Photo Collage for Your Computer Desktop

I just happened to come across a really cool site tonight. I have so many pictures on my computer and memory cards that I haven't done anything with. All of a sudden, it's really bothering me and I want to create some books, collages, etc.


This is a free service that you can upload pictures from your facebook, flickr, or from your computer. It is super easy to make and you don't have to give them any personal information! If you would like, you can order prints of the poster collages for a pretty decent price as well.

Go to www.postermywall.com and click on "Create your poster now".

Next click Facebook InstaCollage

Choose your orientation

Now you will have to allow access to your facebook account. It will pull up all of your albums. Click the photos that you want to appear on your poster. For a good quality poster, the site recommends that you choose at least 80 photos. It seems like a lot, but I have way more than that on my page.

When you have chosen your photos, it will give you a few more options for borders, etc.

When you are finished, click on Download at the top of the page. It will allow you to save to your computer. It will automatically save with a different extension, although it is a jpg. So, you will need to save it with .jpg in order to be able to open the collage.

Go to your control panel and choose Display. Change the photo in the Desktop tab to your poster and it makes the best desktop background ever!


It will look better than it does on my blog because it is a lot bigger!

Monday, April 4, 2011

How to Disguise a Tear in a Dress Neckline

My friend's daughter got a small tear in the neckline of her dress. It was definitely a dress that had to be saved!

First I zig zag stitched across the tear a couple of times.


Then I sewed a square of velcro right in the middle along the top of the neck line.

Now is the fun part. I picked out a few pretty flowers, cut the green part down on the back, and glued velcro to them. (Some flowers will come apart if you cut the plastic off. If this happens, you can hot glue the pieces back together!)


Now she has her super cute dress with interchangeable colored flowers!

Saturday, April 2, 2011

Eco-Friendly Party Favor Bag Idea - Capri Sun Wallet Tutorial

Capri Suns are a great thing to upcycle. I have been making tote bags, lunch bags, purses, aprons, wallets, belts, etc. My MOMS Club is going to be hosting a playdate at an indoor playground for a group of moms and kids from SafeHouse. SafeHouse is a safe place for women and children to stay when they break away from abusive situations.

We want to give both the moms and kids a "goody bag" when they leave. I thought that a great idea would be to use Capri Sun Wallets as the bags. It's something kids love and a great way to upcycle and not create more trash for the landfill.


I go to my sons school and collect Capri Sun pouches at lunch. The lunch room is really loud, but it's actually a lot of fun to hang out with the kids.I bring my Capri Sun tote bag and walk around to the lunch tables and collect the empties. It's really funny to watch the kids try to suck them down when they see me coming. I have been able to collect as many as 100 pouches is one day!

Once you get enough pouches, throw away the straws and peel any remaining straw wrappers off of the front. Next, put them in your sink and slit the bottom open. Then rinse them clean.


You will need 4 cleaned pouches to make a large wallet/goody bag.

Using a wide zig zag stitch, sew 2 pouches right next to each other. Make sure to overlap the pouches enough to make sure that they are sturdy. Sew 2 more together.


Then overlap the one row on top of the other and zig zag them together. Now you will have a rectangle made of 4 pouches.


Turn the rectangle so that the labels are upside down, but the silver side is showing. Fold the bottom side up. This will be the actual pouch.

Now zig zag stitch through both layers, starting on one end, making your way across the top and back down the other side.


This stitched side will be the flap. Fold it down and secure with some sticky velcro.


You're done!


If you don't want to make one yourself, you can check out my Etsy Store for my Capri Sun creations or my Facebook page, Made by Mel-Upcycle the Sun. A percentage of my Capri Sun sales will be donated to my son's school, David M. Cox Elementary!

Don't forget to "like" my You Made That? facebook page as well!