Labels

Showing posts with label Cool Crafty Things. Show all posts

Wednesday, March 28, 2012

Jamberry Nails - Buy, Host, Join my team!

I just recently started selling Jamberry Nails nail shields. They are AMAZING!


All of my photos are of "real" customers, not models! These nail shields are vinyl shields that are applied with heat and pressure. (Blow dryer or small heater) They last on fingers for up to 2 weeks and toes for 5-6 weeks! They have a shiny protective coating so they won't scuff or chip at all!


There are over 165 different styles that can be mixed and matched! They are MADE IN THE USA!!!!!


As long as they are removed as directed, they will NOT damage your nails!!!


There are NO harsh chemicals at all and are totally safe for kids to wear or for moms with babies!


Interested??? Feel free to contact me with any questions... www.melaniebyrd.jamberrynails.net

You can buy them online...they are on sale through the summer - Buy 3 Get 1 Free!

You can host a catalog party and earn FREE products and 1/2 off products!

If you are looking to start a business, now is the time to join! This is a pretty new company and you can get started at ground level! There are not very many reps yet...just think of the potential! It is only $99 to get started. Just by wearing the shields, you are your own advertisement!!!

Friday, February 17, 2012

Easy Kids Journal or Drawing Book Tutorial

I love volunteering my my kids classes! The Kindergarten teacher has the best ideas and I get to make a lot of creative things for the kiddos to use. Today she had me make journals for them to practice their writing in. I'm not sure where she got the idea from, but probably from Pinterest.


I'm sorry about the cell phone quality photos, but I didn't have my regular camera with me.

You will need a large piece of construction paper, white copy paper (or lined paper), a rubber band and 2 popsicle sticks.

(I cannot get this photo to flip around!!!!)

Fold the construction paper in half and hole punch with 2 holes.

Cut the copy paper in half (or to the size you want them to be) and hole punch them with 2 holes just like the construction paper.


String a rubber band through the back cover and the copy paper. Then put a popsicle stick through that rubber band to hold in place. Take the other end of the rubber band and string it through the other hole of the cover and papers. Now string that side through the front of the cover and slide a popsicle stick through the end of the rubber band. 


Remove the first popsicle stick and pull the rubberband through the front cover. Slide the other end of the stick through the rubber band and you're done!


Monday, February 6, 2012

The Wide World of Geekery!

Ok, so my husband is a comic book/figure collector. I never knew that there were so many of these men and women out there until recently. I have been selling a bunch of my comic book wall hanging letters on Etsy, most for kids room decor. You can check them out here.


So now that I know how many adults are comic fans, it has opened up a whole new part of my crafty brain!

I started by making this jewelry box, which I absolutely love.


I just finished some awesome coasters with heroes on them.


 and just listed this amazing wine rack in my Etsy store.


Sometimes when I finish a project, I just can barely stand how excited I get to share it with anyone who will even remotely care. This is one of those projects!

Monday, January 30, 2012

Yoshi (Super Mario Bros) Handmade Birthday Party Invitations

My son wants a Yoshi themes birthday party, so we created these super cute invitations tonight. It was a lot of fun to make them with both of my boys. We had a crafty night and accomplished something for the party! I  am planning a couple of really cute favor/game ideas and will post them after the party!


Friday, January 13, 2012

Mod Podged Comic Book Jewelry Box and Cell Phone Charging Area

When I found this cute jewelry box at a thrift store for $2, I knew it had to be Mod Podged with Comics! Since it's a girly item I thought it would be best to use all female characters.


The jewelry box was in great condition, but had a couple of nicks and the paint was old. After being Mod Podged, the nicks are not noticeable at all! I removed the screws and hardware from the front and removed the glass pieces before working on it. I then painted the drawers and entire inside of the box black. Then I touched up some other areas as well with the black paint.


The only real problem with this jewelry box is that there is a drawer missing. So, after Googling ideas, I found an idea to drill a hole in the back and make a cell phone charging area...brilliant!

Wednesday, December 14, 2011

More Mod Podged Comic Book Letters

I have had a lot of interest in my Mod Podged Comic Book Letters lately. I am so flattered that my project has been pinned so many times on Pinterest!!!

Here is my latest creation:


These are so much fun to create and I love doing different characters. I also made the word READ for one of my friends that is a teacher. She wanted to hang them in her classroom. What a great idea! I am going to make them for my sons teachers as end of the year gifts. I had her send me a picture of them hanging on her wall:


Here are some other letters I have made as well:


You can find these custom letters in my Etsy shop here: www.melrowe.etsy.com

I hope everyone is having a wonderful Holiday Season!

Wednesday, November 16, 2011

Fringy Scarf Photo Shoot With Some Beautiful Little Models!

Today was a lot of fun. A friend of mine offered to take some really nice photos for my Etsy site. Her daughter and another friend's daughter were my little models. They did such a great job and the photos turned out so cute!


My scarves made really cute Christmas or Birthday gifts and can be purchased in my Etsy Shop here. I also have a large variety of adult sized scarves in the shop as well. I love doing custom orders, so if you're interested in something specific, let me know!

Sunday, August 7, 2011

My New Dance Skirts...enter to win one!!!
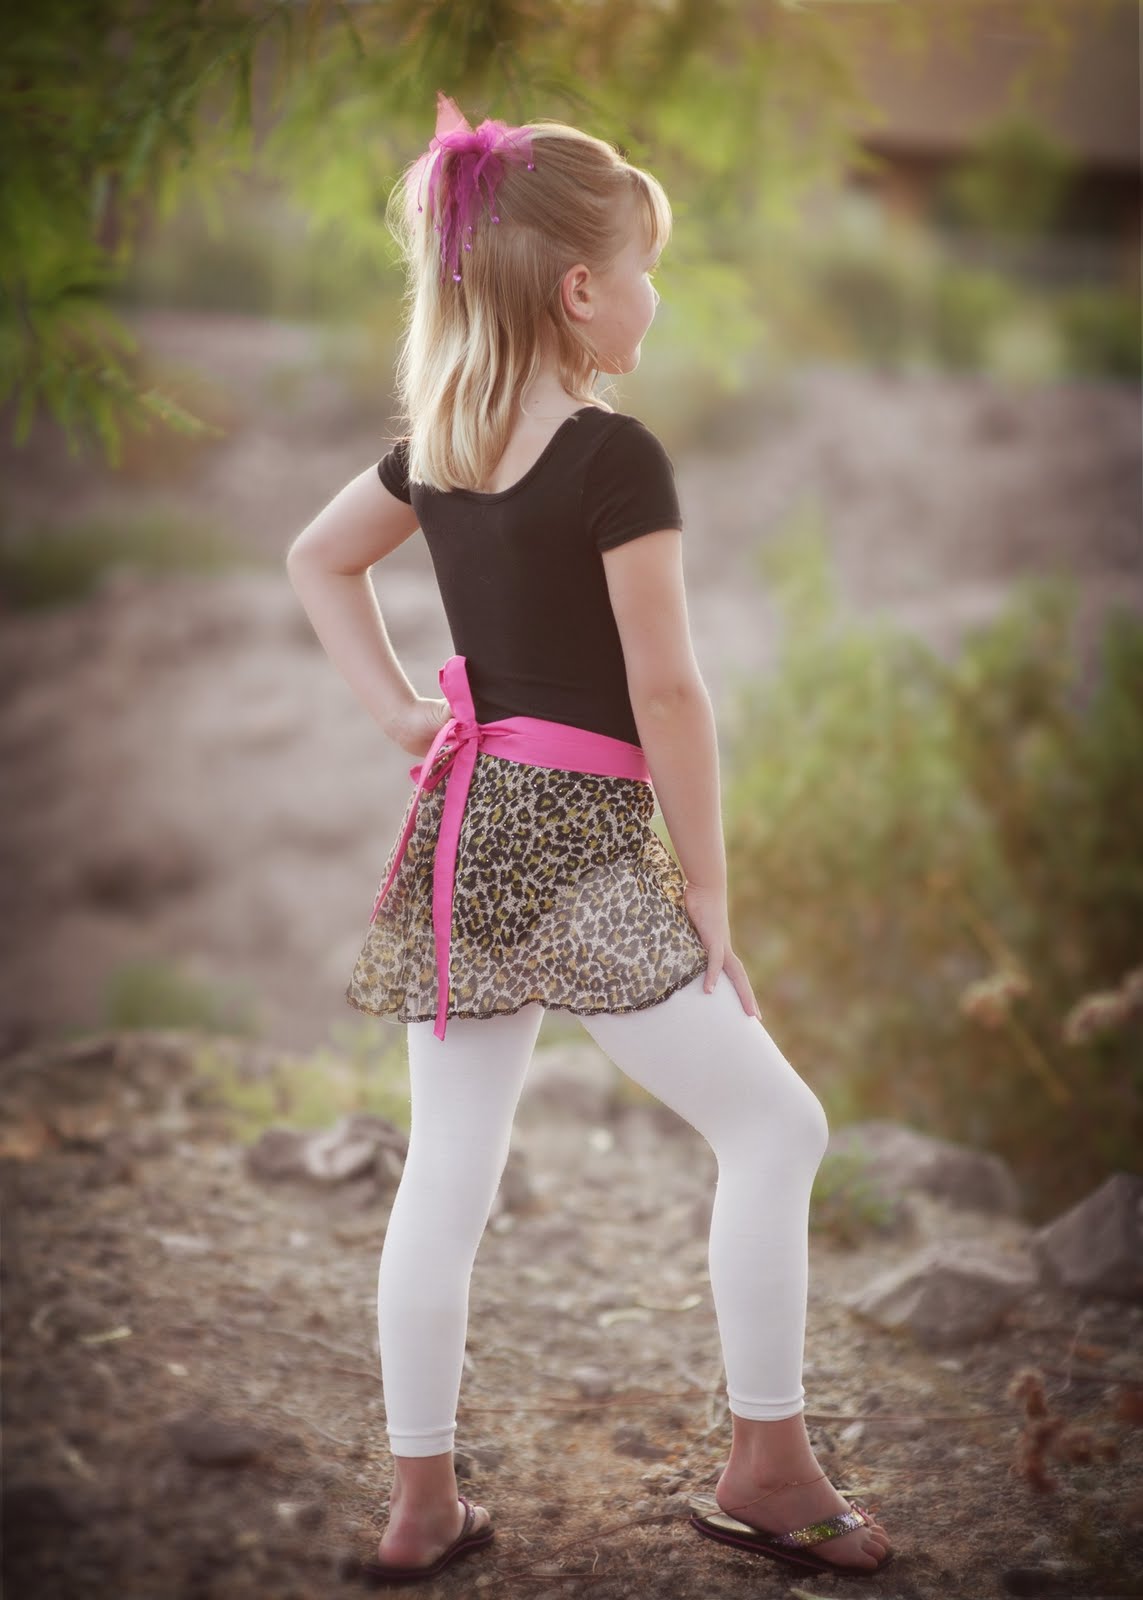
I am so excited to announce that I am going to be selling my handmade girls wrap dance skirts in a local dance studio!!! One of my friends is an amazing photographer and has just sent me the photos from our shoot..

I am so happy with them that I am going to be giving one of the skirts away!!!

I am going to use one of these photos on my tags to hang from each skirt and am not sure which one looks the best. So, I would love some input from you!

To enter my giveaway, please follow my blog and leave a comment telling me which photo you think I should use on my tags. For an extra entry, like my on facebook. The winner can choose from a few different fabrics and sizes!!!

The winner will be chosen on August 31st...so make sure I have your email address.

 1


 2


 3


 4


5

Friday, August 5, 2011

Whoopdwhoop Craft Swap

I have been participating in the Whoopdwhoop Craft Swap. It is free and a really great idea!

How it works is that you list some items on their website and receive "whoops". You get to choose how many whoops your item will "sell" for, between 1-5. When you have enough whoops, you can request any item from any other member. If they accept, your whoops will be given to that member. They will send the item to you. If someone requests your item, you will receive their whoops. Then you will be responsible for the shipping charge.

Does that make sense?

Well, I have received a beautiful mermaid print from Whoopdwhoop. I bought a cheap frame from the Dollar Store. Here is the before and after.


I just painted the frame a nice green color and glued some colored shells around the frame. I got them at Joannes. I hung it up in the bathroom and love it!

Thursday, June 23, 2011

DIY Dress From 3 Pieces of Fabric - Tutorial

I made this dress for a friend to wear to her 20th high school reunion this summer. It was super easy and really turned out cute!


For this dress, I recommend buying 2 yards of fabric. I made this with 1 1/2 yds, but it really cut it close!

I don't really measure, but just wrap the fabric around the bust and body. The bust should be tight, so that it doesn't fall down. I like to fold the fabric in half so that  I don't have to sew the top neck line.

The body part needs to be big enough to fit and hang loosely around the biggest part of the hips. If not, it will be clingy and look gross. In the middle, I gathered the body piece a bit and then sewed the two pieces together, stretching a bit as I went.

Since this is a nice stretchy knit fabric, I didn't even hem the bottom, just made sure to cut it very straight. I just cut a long strip for the tie and that's it.

When wearing it, I recommend safety pinning the tie to the dress from the inside to keep it in place and to hide the seam where the 2 pieces are attached.


Friday, June 3, 2011

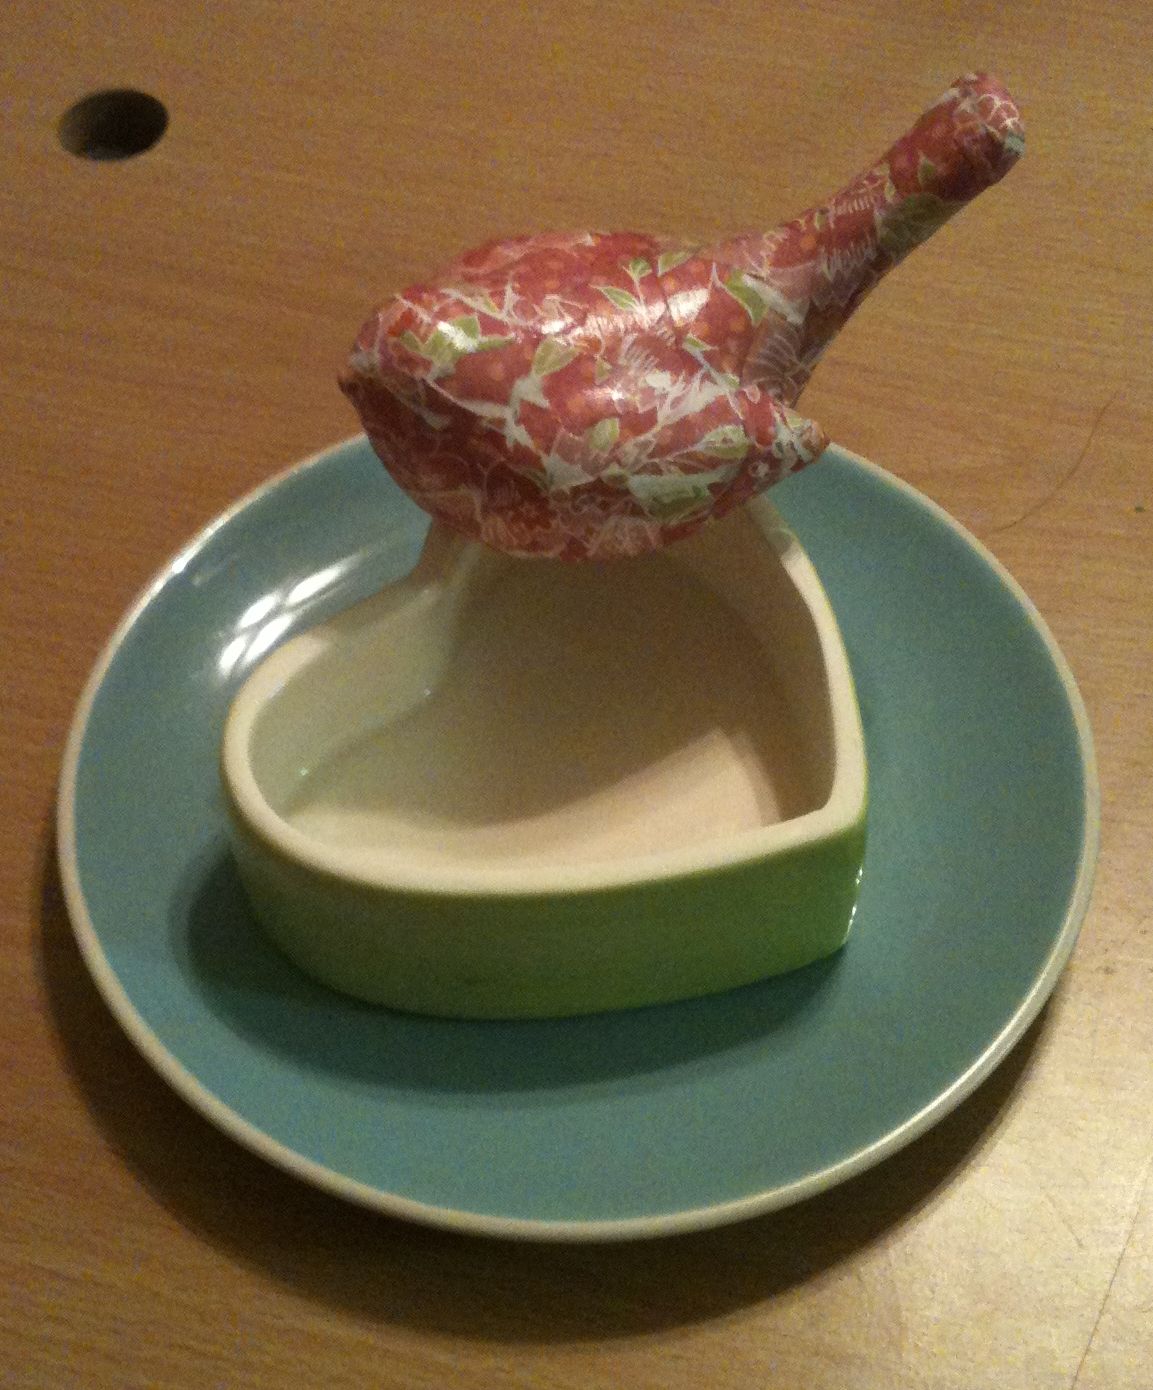
$3 Bird Feeder - Another Mod Podge Project

This is my mom's birthday gift this year. Isn't it cute?

I got all 3 pieces at the $1 store. I Mod Podged the bird with scrapbook paper and used E-6000 to glue them together. It was such an easy project. The hardest part was waiting for the glue to dry!

Friday, May 6, 2011

Teacher's Appreciation Week Gift - Mod Podged Clipboard Tutorial


Of course I waited until Thursday night to decide what I was going to make for my son's teacher for Teacher's Appreciation Week! Well, I just finished this super cute clipboard!

I bought a clipboard at a thrift store about 3 months ago for $1.00 and finally got around to using it. I used 2 coordinating pieces of scrapbook paper, some grossgrain ribbon and Mod Podge.

The how to:
1. Measure the clip board and cut the paper to fit the lengths you want to cover. You may want to use an exacto knife to cut around the metal clip part.
2. Brush some Mod Podge over the clipboard and stick the first paper to it. I use my finger to smooth the air bubbles out. Then brush some more Mod Podge on top of the paper and smooth it out as well.
3. Repeat with the second piece of paper. I overlapped the papers, but you could cut and line them up as well.
4. Using scissors, round the edges of the paper to match the rounded edges of the clipboard.
5. Cut small pieces of ribbon and tie them on to the clip.

That's it! This makes a super easy, cheap gift! I had all of the supplies, so it cost me nothing to make.

Monday, April 18, 2011

National Wildlife Federation Auction and Giveaway!!!

Check out this amazing auction and giveaway on Upcycled By Ash!

Find the auction through her facebook page: National Wildlife Federation Auction - Upcycled By Ash.

She has some amazing items including some bags upcycled from Alyssa Milano's pants. Too funny!


I love these upcycled water bottle cuff bracelets as well

Check out this blog for some great upcycling ideas!

Don't forget to enter the giveaway! I can't believe that the winner will receive all of these items!


I am linking to Debbiedoo's Newby Party. If you have been blogging for under 1 year OR have under 100 followers, link up and join the fun!


Thursday, March 31, 2011

Hi Everyone! It's Melanie from You Made That? and I am so excited to be partying with you all!

I am linking to the Ultimate Blog Party 2011 and hope to meet a bunch of new people!

Ultimate Blog Party 2011


My blog is all about easy and thrifty craft ideas and recipes. I am a stay at home mom and have just started blogging a couple of months ago. Here are a few of my tutorials:


Yarn Wrapped Bangle Bracelet - Upcycled from a Mac & Cheese Box!


Mod Podged Comic Book Letters


I am so glad that you stopped by my blog. Please follow me and leave a comment. I will follow you back! Have a great time at the Ultimate Blog Party 2011!

Thank you Janice & Susan!